“Yeah It’s on. ”
正文
Loaders是webpack提供的最激动人心的功能之一了。通过使用不同的loader,webpack有能力调用外部的脚本或工具,实现对不同格式的文件的处理,比如说分析转换scss为css,或者把下一代的JS文件(ES6,ES7)转换为现代浏览器兼容的JS文件,对React的开发而言,合适的Loaders可以把React的中用到的JSX文件转换为JS文件。
Loaders需要单独安装并且需要在webpack.config.js中的modules关键字下进行配置,Loaders的配置包括以下几方面:
- test:一个用以匹配loaders所处理文件的拓展名的正则表达式(必须)
- loader:loader的名称(必须)
- include/exclude:手动添加必须处理的文件(文件夹)或屏蔽不需要处理的文件(文件夹)(可选);
- query:为loaders提供额外的设置选项(可选)
style-loader
https://www.npmjs.com/package/style-loader
Adds CSS to the DOM by injecting a <style> tag
使用<style>将css-loader内部样式注入到我们的HTML页面
It’s recommended to combine style-loade
| Name | Type | Default | Description |
|---|---|---|---|
| singleton | Boolean | undefined | Reuses a single <style></style> element, instead of adding/removing individual elements for each required module. |
Description 也就是说只会插入一个 style标签
style-loader/url
css单独打包,并用url引入(link标签) 要配合publicPath
style-loader/useable
use() unuse()
style-loader和mini-css-extract-plugin的区别 (重要)
- style-loader:把 js 中 import 导入的样式文件代码,打包到 js 文件中,运行 js 文件时,将样式自动插入到
<style>标签中 - mini-css-extract-plugin: 把 js 中 import 导入的样式文件代码,打包成一个实际的 css 文件,结合 html-webpack-plugin,在 dist/index.html 中以 link 插入 css 文件;默认将 js 中 import 的多个 css 文件,打包时合成一个
css-loader
用处:加载.css文件
https://www.npmjs.com/package/css-loader
The css-loader interprets @import and url() like import/require() and will resolve them.
Good loaders for requiring your assets are the file-loader and the url-loader which you should specify in your config (see below).
注意点
For URLs that start with a /, the default behavior is to not translate them.
以“/”开始的url,默认行为是不翻译它们
url(/image.png) => url(/image.png)
file-loader
https://www.npmjs.com/package/file-loader Instructs webpack to emit the required object as file and to return its public URL
Install
npm install --save-dev file-loader
Usage
By default the filename of the resulting file is the MD5 hash of the file’s contents with the original extension of the required resource.
import img from ‘./file.png’
webpack.config.js
module.exports = {
  module: {
    rules: [
      {
        test: /\.(png|jpg|gif)$/,
        use: [
          {
            loader: 'file-loader',
            options: {}
          }
        ]
      }
    ]
  }
}
Emits file.png as file in the output directory and returns the public URL
"/public/path/0dcbbaa7013869e351f.png"
如果我们希望在页面引入图片(包括img的src和background的url)。当我们基于webpack进行开发时,引入图片会遇到一些问题。
其中一个就是引用路径的问题。拿background样式用url引入背景图来说,我们都知道,webpack最终会将各个模块打包成一个文件,因此我们样式中的url路径是相对入口html页面的,而不是相对于原始css文件所在的路径的。这就会导致图片引入失败。这个问题是用file-loader解决的,file-loader可以解析项目中的url引入(不仅限于css),根据我们的配置,将图片拷贝到相应的路径,再根据我们的配置,修改打包后文件引用路径,使之指向正确的文件。
另外,如果图片较多,会发很多http请求,会降低页面性能。这个问题可以通过url-loader解决。url-loader会将引入的图片编码,生成dataURl。相当于把图片数据翻译成一串字符。再把这串字符打包到文件中,最终只需要引入这个文件就能访问图片了。当然,如果图片较大,编码会消耗性能。因此url-loader提供了一个limit参数,小于limit字节的文件会被转为DataURl,大于limit的还会使用file-loader进行copy。
url-loader和file-loader是什么关系呢?简答地说,url-loader封装了file-loader。url-loader不依赖于file-loader,即使用url-loader时,只需要安装url-loader即可,不需要安装file-loader,因为url-loader内置了file-loader。通过上面的介绍,我们可以看到,url-loader工作分两种情况:
- 文件大小小于limit参数,url-loader将会把文件转为DataURL
- 文件大小大于limit,url-loader会调用file-loader进行处理,参数也会直接传给file-loader。因此我们只需要安装url-loader即可。
url-loader
https://www.npmjs.com/package/url-loader
Loads files as base64 encoded URL
The url-loader works like the file-loader, but can return a DataURL if the file is smaller than a byte limit.
Install
npm install --save-dev url-loader
import img from ‘./image.png’
webpack.config.js
module.exports = {
  module: {
    rules: [
      {
        test: /\.(png|jpg|gif)$/,
        use: [
          {
            loader: 'url-loader',
            options: {
              limit: 8192
            }
          }
        ]
      }
    ]
  }
}
limit
If the file is greater than the limit (in bytes) the file-loader is used by default and all query parameters are passed to it. You can use other loader using fallback option.
The limit can be specified via loader options and defaults to no limit.
webpack.config.js
{
  loader: 'url-loader',
  options: {
    limit: 8192
  }
}
img-loader
https://www.npmjs.com/package/img-loader
Image minimizing loader for webpack 2, meant to be used with url-loader, file-loader, or raw-loader
Minify PNG, JPEG, GIF and SVG images with imagemin
Share your code. npm Orgs help your team discover, share, and reuse code. Create a free org » img-loaderpublic
npm Version Greenkeeper badge Build Status
JS Standard Style MIT License
Image minimizing loader for webpack 2, meant to be used with url-loader, file-loader, or raw-loader
Minify PNG, JPEG, GIF and SVG images with imagemin
Issues with the minimized output should be reported to imagemin.
Comes with the following optimizers:
- gifsicle — Compress GIF images
- mozjpeg — Compress JPEG images
- optipng — Compress PNG images
- pngquant — Compress PNG images
- svgo — Compress SVG images
Install `npm install img-loader –save-de
Usage
Documentation: Using loaders
module: {
  rules: [
    {
      test: /\.(jpe?g|png|gif|svg)$/i,
      use: [
        'url-loader?limit=10000',
        'img-loader'
      ]
    }
  ]
}
The default minification includes: gifsicle, mozjpeg, optipng, & svgo. Each with their default settings.
pngquant can be enabled by configuring it in the options.
Options Options can also be passed by specifying properties matching each optimizer in your rule options. false or null can be used to disable one of the default optimizers.
{
  module: {
    rules: [
      {
        test: /\.(jpe?g|png|gif|svg)$/i,
        use: [
          'url-loader?limit=10000',
          {
            loader: 'img-loader',
            options: {
              enabled: process.env.NODE_ENV === 'production',
              gifsicle: {
                interlaced: false
              },
              mozjpeg: {
                progressive: true,
                arithmetic: false
              },
              optipng: false, // disabled
              pngquant: {
                floyd: 0.5,
                speed: 2
              },
              svgo: {
                plugins: [
                  { removeTitle: true },
                  { convertPathData: false }
                ]
              }
            }
          }
        ]
      }
    ]
  }
}
vue-loader
vue-loader 是一个 webpack 的 loader,可以将用下面这个格式编写的 Vue 组件转换为 JavaScript 模块:
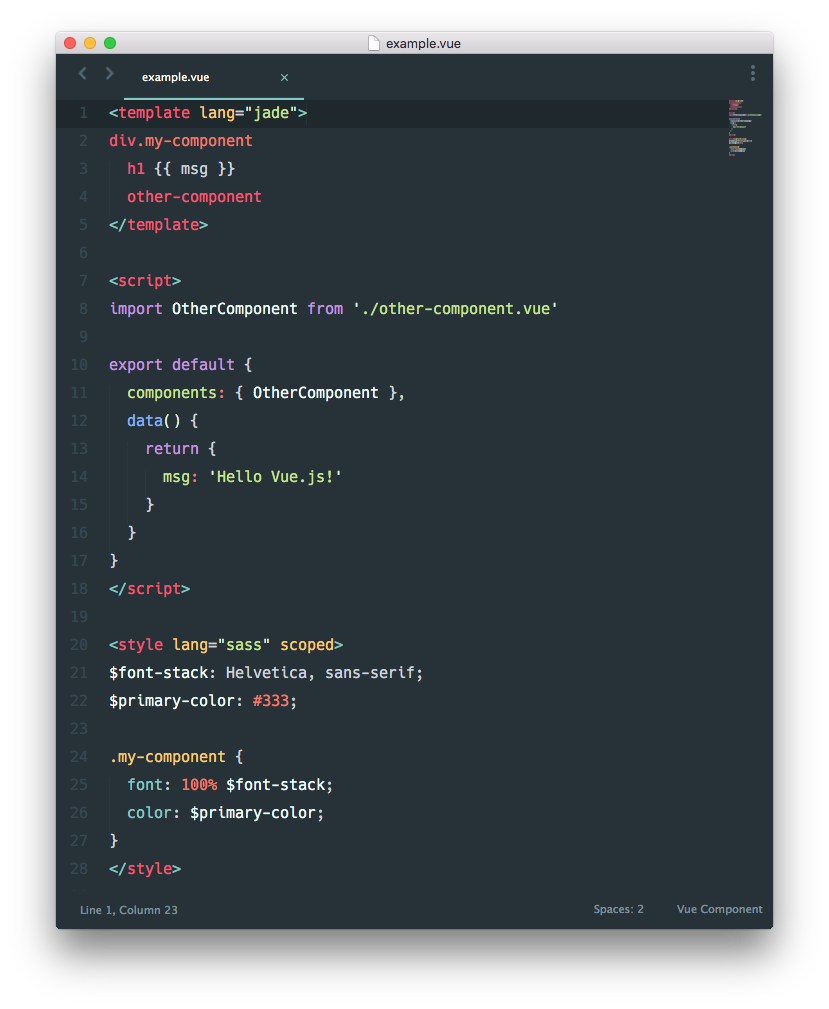
vue-loader 提供的很酷的特性:
- 默认支持 ES2015;
- 允许对 Vue 组件的组成部分使用其它 webpack loader,比如对
<style>使用 SASS 和对<template>使用 Jade; - .vue 文件中允许自定义节点,然后使用自定义的 loader 进行处理;
把
<style>和<template>中的静态资源当作模块来对待,并使用 webpack loader 进行处理; - 对每个组件模拟出 CSS 作用域;
- 支持开发期组件的热重载。
你可以像下面这样使用 SASS 语法编写样式:
<style lang="sass">
  /* write SASS! */
</style>
简而言之,编写 Vue.js 应用程序时,组合使用 webpack 和 vue-loader 能带来一个现代,灵活并且非常强大的前端工作流程。
vue-style-loader
https://www.npmjs.com/package/vue-style-loader
This is a fork based on style-loader. Similar to style-loader, you can chain it after css-loader to dynamically inject CSS into the document as style tags. However, since this is included as a dependency and used by default in vue-loader, in most cases you don’t need to configure this loader yourself.
 use: [
          'vue-style-loader',
          {
            loader: 'css-loader',
            options: {
              modules: true,
              localIdentName: '[local]_[hash:base64:5]'
            }
          },
     ]
Differences from style-loader
Server-Side Rendering Support
When bundling with target: 'node', the styles in all rendered components are collected and exposed on the Vue render context object as context.styles, which you can simply inline into your markup’s <head>. If you are building a Vue SSR app, you probably should use this loader for CSS imported from JavaScript files too.
babel-loader
https://webpack.js.org/loaders/babel-loader/#root
To exclude node_modules, see the exclude option in the loaders config as documented above.
babel-loader 设置 exclude:
exclude: '/node_modules/'
You can also speed up babel-loader by as much as 2x by using the cacheDirectory option. This will cache transformations to the filesystem.
cache 默认在开发环境是memory
可以改 cache.type 为 ‘filesystem’
postcss-loader
由于postcss-loader东西太多这里只是简单介绍,详情见postcss-loader的blog
Loader for webpack to process CSS with PostCSS
| **Use it after css-loader and style-loader, but before other preprocessor loaders like e.g sass | less | stylus-loader** |
postcss.config.js
module.exports = {
  parser: 'sugarss',
  plugins: {
    'postcss-import': {},
    'postcss-cssnext': {},
    'cssnano': {}
  }
}
webpack.config.js (recommended)
When postcss-loader is used standalone (without css-loader) don’t use @import in your CSS, since this can lead to quite bloated bundles
module.exports = {
  module: {
    rules: [
      {
        test: /\.css$/,
        use: [
          'style-loader',
          { loader: 'css-loader', options: { importLoaders: 1 } },
          'postcss-loader'
        ]
      }
    ]
  }
}
source-map-loader
module.exports = {
  module: {
    rules: [
      {
        test: /\.js$/,
        use: ["source-map-loader"],
        enforce: "pre"
      }
    ]
  }
};
source-map-loader从所有JavaScript条目中提取现有的源映射。这包括内联源映射以及通过URL链接的映射。所有源映射数据都将传递给webpack,以便按照webpack.config.js中选项指定的所选源映射样式进行处理。devtool
source-map-loader extracts existing source maps from all JavaScript entries. This includes both inline source maps as well as those linked via URL. All source map data is passed to webpack for processing as per a chosen source map style specified by the devtool option in webpack.config.js.
Expose Loader
https://www.npmjs.com/package/expose-loader
The expose loader adds modules to the global object. This is useful for debugging, or supporting libraries that depend on libraries in globals.
expose加载程序将模块添加到全局对象。这对于调试或支持全局中依赖于库的库非常有用。
thread-loader
https://www.webpackjs.com/loaders/thread-loader/
Runs the following loaders in a worker pool.
把这个 loader 放置在其他 loader 之前, 放置在这个 loader 之后的 loader 就会在一个单独的 worker 池(worker pool)中运行
在 worker 池(worker pool)中运行的 loader 是受到限制的。例如:
- 这些 loader 不能产生新的文件。
- 这些 loader 不能使用定制的 loader API(也就是说,通过插件)。
- 这些 loader 无法获取 webpack 的选项设置。
每个 worker 都是一个单独的有 600ms 限制的 node.js 进程。同时跨进程的数据交换也会被限制。
请仅在耗时的 loader 上使用
svgr/webpack
https://react-svgr.com/docs/webpack/
SVGR provides an official webpack.js loader to import SVG as React components.
补充
Webpack的Loader为什么是从右往左写?
比如说下面的Loader写法:
style-loader!css-loader!sass-loader
其实为啥是从右往左,而不从左往右,只是Webpack选择了compose方式,而不是pipe的方式而已
- less-loader 是将less文件编译成css
- sass-loader 是将sass文件编译成css
- css-loader 是处理css文件中的url()等
- style-loader 将css插入到页面的style标签顺便告诉你
在output中path和publicPath
- path 是你打包的路径
- publicpath 是你在html 中引入的路径
browserslist
为了让所有插件共享browserslist
我们在package.json文件中加入
  "browserslist": [
    "> 1%",
    "last 2 versions",
    "not ie <= 8"
  ]
上面是vue默认配置
编写loader
https://mp.weixin.qq.com/s/f200Q62XL50d0a_DgI6UlA
Loader 就像是一个翻译员,能把源文件经过转化后输出新的结果,并且一个文件还可以链式的经过多个翻译员翻译。
webpack允许我们使用loader来处理文件,loader是一个导出为function的node模块。可以将匹配到的文件进行一次转换,同时loader可以链式传递。loader文件处理器是一个CommonJs风格的函数,该函数接收一个 String/Buffer 类型的入参,并返回一个 String/Buffer 类型的返回值。
Loader 的职责
一个 Loader 的职责是单一的,只需要完成一种转换。 如果一个源文件需要经历多步转换才能正常使用,就通过多个 Loader 去转换。 在调用多个 Loader 去转换一个文件时,每个 Loader 会链式的顺序执行, 第一个 Loader 将会拿到需处理的原内容,上一个 Loader 处理后的结果会传给下一个接着处理,最后的 Loader 将处理后的最终结果返回给 Webpack。
所以,在你开发一个 Loader 时,请保持其职责的单一性,你只需关心输入和输出。
由于 Webpack 是运行在 Node.js 之上的,一个 Loader 其实就是一个 Node.js 模块,这个模块需要导出一个函数。 这个导出的函数的工作就是获得处理前的原内容,对原内容执行处理后,返回处理后的内容。
一个最简单的 Loader 的源码如下:
module.exports = function(source) {
  // source 为 compiler 传递给 Loader 的一个文件的原内容
  // 该函数需要返回处理后的内容,这里简单起见,直接把原内容返回了,相当于该 Loader 没有做任何转换
  return source;
};
由于 Loader 运行在 Node.js 中,你可以调用任何 Node.js 自带的 API,或者安装第三方模块进行调用:
const sass = require('node-sass');
module.exports = function(source) {
  return sass(source);
};
获得 Loader 的 options
在最上面处理 SCSS 文件的 Webpack 配置中,给 css-loader 传了 options 参数,以控制 css-loader。 如何在自己编写的 Loader 中获取到用户传入的 options 呢?需要这样做:
const loaderUtils = require('loader-utils');
module.exports = function(source) {
  // 获取到用户给当前 Loader 传入的 options
  const options = loaderUtils.getOptions(this);
  return source;
};
上面的 Loader 都只是返回了原内容转换后的内容,但有些场景下还需要返回除了内容之外的东西。
例如以用 babel-loader 转换 ES6 代码为例,它还需要输出转换后的 ES5 代码对应的 Source Map,以方便调试源码。 为了把 Source Map 也一起随着 ES5 代码返回给 Webpack,可以这样写:
module.exports = function(source) {
  // 通过 this.callback 告诉 Webpack 返回的结果
  this.callback(null, source, sourceMaps);
  // 当你使用 this.callback 返回内容时,该 Loader 必须返回 undefined,
  // 以让 Webpack 知道该 Loader 返回的结果在 this.callback 中,而不是 return 中
  return;
};
同步loader
同步 loader,我们可以通过return和this.callback返回输出的内容
module.exports = function(content, map, meta) {
  //一些同步操作
  outputContent=someSyncOperation(content)
  return outputContent;
}
如果返回结果只有一个,也可以直接使用 return 返回结果。但是,如果有些情况下还需要返回其他内容,如sourceMap或是AST语法树,这个时候可以借助webpack提供的api this.callback
module.exports = function(content, map, meta) {
  this.callback(
    err: Error | null,
    content: string | Buffer,
    sourceMap?: SourceMap,
    meta?: any
  );
  return;
}
第一个参数必须是 Error 或者 null 第二个参数是一个 string 或者 Buffer。可选的:第三个参数必须是一个可以被这个模块解析的 source map。可选的:第四个选项,会被 webpack 忽略,可以是任何东西【可以将抽象语法树(abstract syntax tree - AST)(例如 ESTree)作为第四个参数(meta),如果你想在多个 loader 之间共享通用的 AST,这样做有助于加速编译时间。】。
异步loader
异步loader,使用 this.async 来获取 callback 函数。
// 让 Loader 缓存
module.exports = function(source) {
    var callback = this.async();
    // 做异步的事
    doSomeAsyncOperation(content, function(err, result) {
        if(err) return callback(err);
        callback(null, result);
    });
};
loader的一些开发技巧
-
尽量保证一个loader去做一件事情,然后可以用不同的loader组合不同的场景需求
-
开发的时候不应该在 loader 中保留状态。loader必须是一个无任何副作用的纯函数,loader支持异步,因此是可以在 loader 中有 I/O 操作的。
-
模块化:保证 loader 是模块化的。loader 生成模块需要遵循和普通模块一样的设计原则。
-
合理的使用缓存 合理的缓存能够降低重复编译带来的成本。loader 执行时默认是开启缓存的,这样一来, webpack 在编译过程中执行到判断是否需要重编译 loader 实例的时候,会直接跳过 rebuild 环节,节省不必要重建带来的开销。但是当且仅当有你的 loader 有其他不稳定的外部依赖(如 I/O 接口依赖)时,可以关闭缓存:
this.cacheable&&this.cacheable(false);
loader-utils
https://www.npmjs.com/package/loader-utils
Utils for webpack loaders
当我们在写自己的webpack-loader时经常会用到这个库
例如:
import loaderUtils from 'loader-utils';


module.exports = function(source){
    // 获取传入进来的options
  const options = loaderUtils.getOptions(this) || {};
}
getOptions
Recommended way to retrieve the options of a loader invocation
获取加载器调用选项的推荐方法
// inside your loader
const options = loaderUtils.getOptions(this);
stringifyRequest
Turns a request into a string that can be used inside require() or import while avoiding absolute paths. Use it instead of JSON.stringify(…) if you’re generating code inside a loader.
将请求转换为可以在require()或import中使用的字符串,同时避免使用绝对路径。如果要在加载器中生成代码,请使用它而不是JSON.stringify(…)。
Why is this necessary? Since webpack calculates the hash before module paths are translated into module ids, we must avoid absolute paths to ensure consistent hashes across different compilations.
为什么有这个必要?由于webpack在将模块路径转换为模块id之前会计算散列,因此我们必须避免绝对路径,以确保不同编译之间的散列是一致的。
This function:
- resolves absolute requests into relative requests if the request and the module are on the same hard drive
- replaces
\with/if the request and the module are on the same hard drive - won’t change the path at all if the request and the module are on different hard drives
- applies
JSON.stringifyto the result
schema-utils
https://www.npmjs.com/package/schema-utils
Package for validate options in loaders and plugins.
用于验证options
// options.json
{
  "type": "object",
  "properties": {
    "option": {
      "type": ["boolean"]
    }
  },
  "additionalProperties": false
}
import validateOptions from 'schema-utils';
import schema from './options.json';

module.exports = function(source){
  const options = loaderUtils.getOptions(this) || {};

  validateOptions(schema, options, {
    name: 'Style Loader',
    baseDataPath: 'options',
  });
}
加载本地 Loader
Npm link 专门用于开发和调试本地 Npm 模块,能做到在不发布模块的情况下,把本地的一个正在开发的模块的源码链接到项目的 node_modules 目录下,让项目可以直接使用本地的 Npm 模块。 由于是通过软链接的方式实现的,编辑了本地的 Npm 模块代码,在项目中也能使用到编辑后的代码。
- 确保正在开发的本地 Npm 模块(也就是正在开发的 Loader)的 package.json 已经正确配置好;
- 在本地 Npm 模块根目录下执行 npm link,把本地模块注册到全局;
- 在项目根目录下执行 npm link loader-name,把第2步注册到全局的本地 Npm 模块链接到项目的 node_moduels 下,其中的 loader-name 是指在第1步中的 package.json 文件中配置的模块名称。
链接好 Loader 到项目后你就可以像使用一个真正的 Npm 模块一样使用本地的 Loader 了。